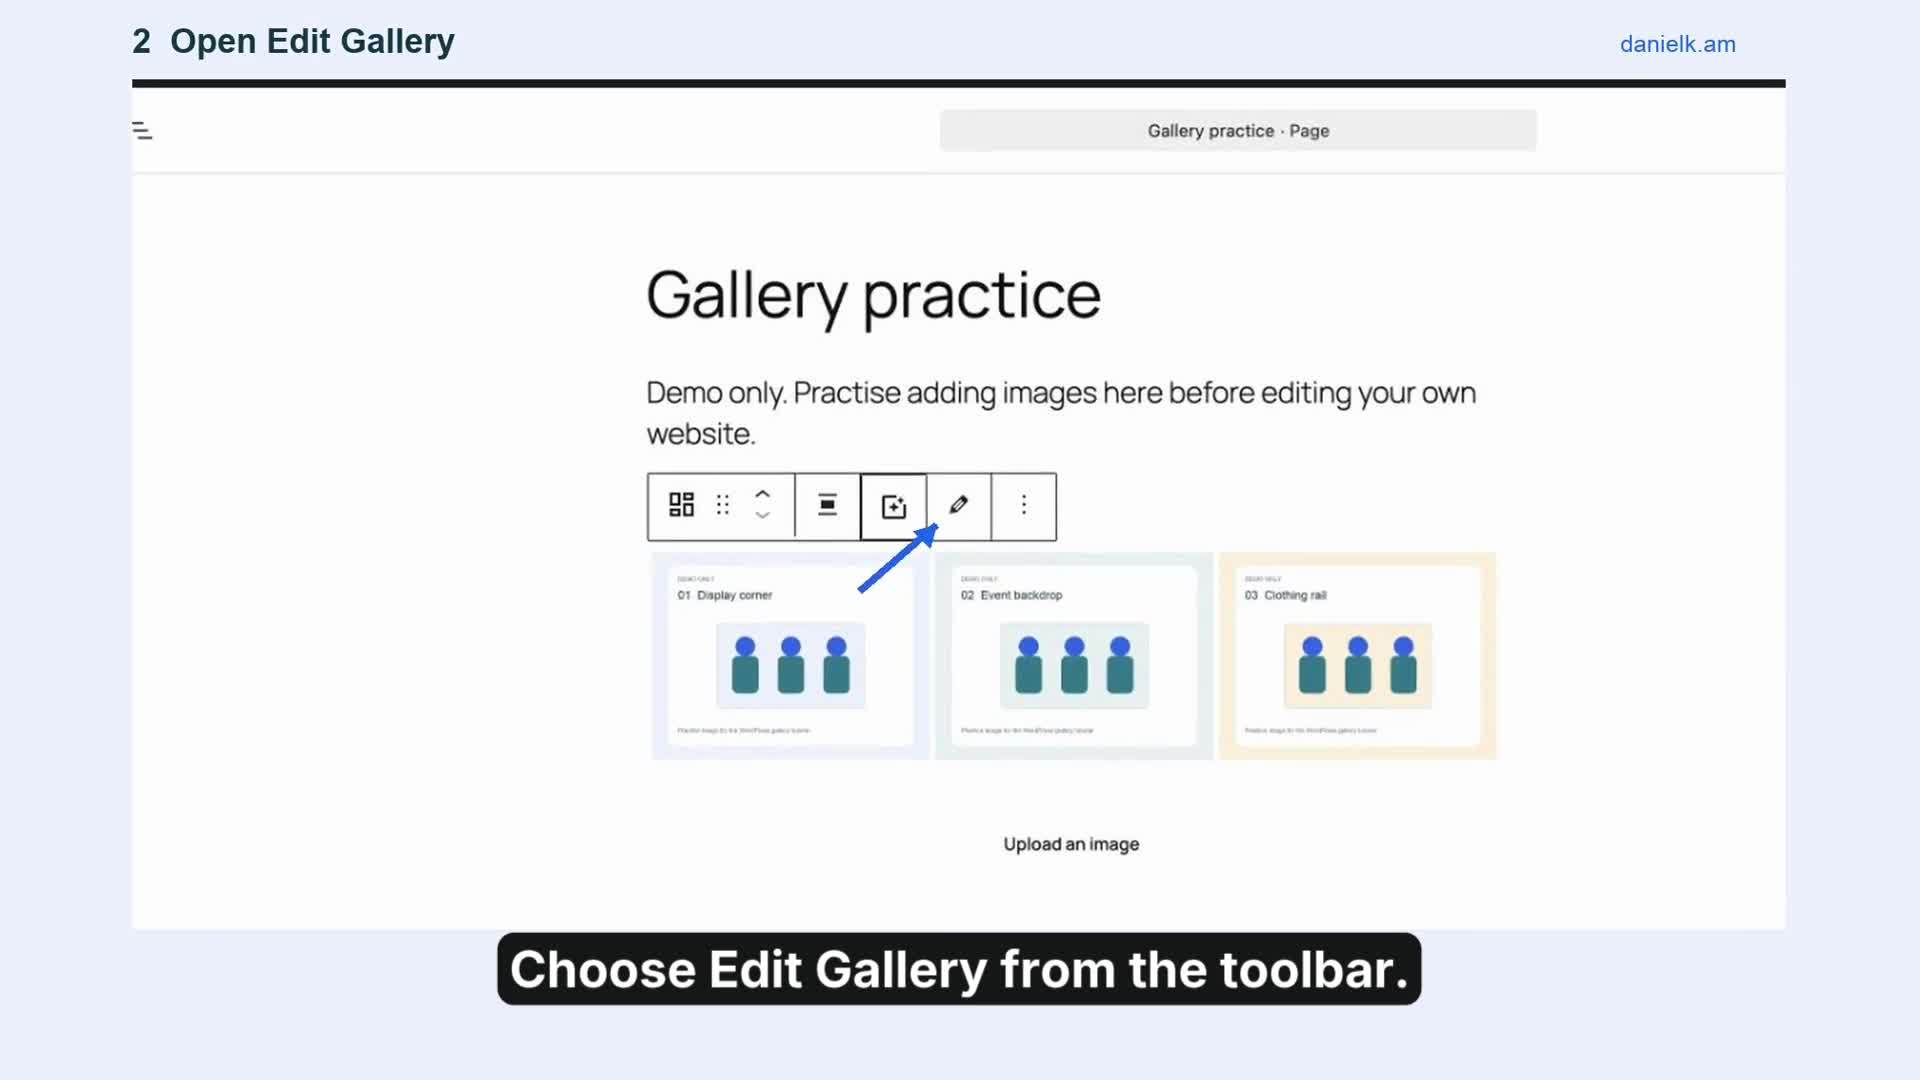
To add photos to a Jetpack Tiled Gallery, select the gallery in the page editor, choose Edit Gallery, then Add to gallery. Select your photos, choose Add to gallery, then Update gallery. Finish by saving the page and checking it on your website.
This guide uses a practice WordPress site and labelled demo images. It covers Jetpack’s Tiled Gallery block, with the Tiled columns style. WordPress’s standard Gallery block and Jetpack’s Slideshow block have different controls.
Before you begin
You’ll need access to edit the page and permission to upload images. Keep the new photos ready on your computer, or use images already in your site’s Media Library. Use clear filenames so you can recognise the right photos.
1. Open the page and select its gallery
From your WordPress dashboard, choose Pages, find the page, and choose Edit. Click inside the existing gallery. The block toolbar should appear, and the Block settings should identify it as Tiled Gallery.
If selecting the gallery is difficult, open Document Overview, sometimes called List View, near the top left of the editor. Select Tiled Gallery from the block list.
2. Open Edit Gallery
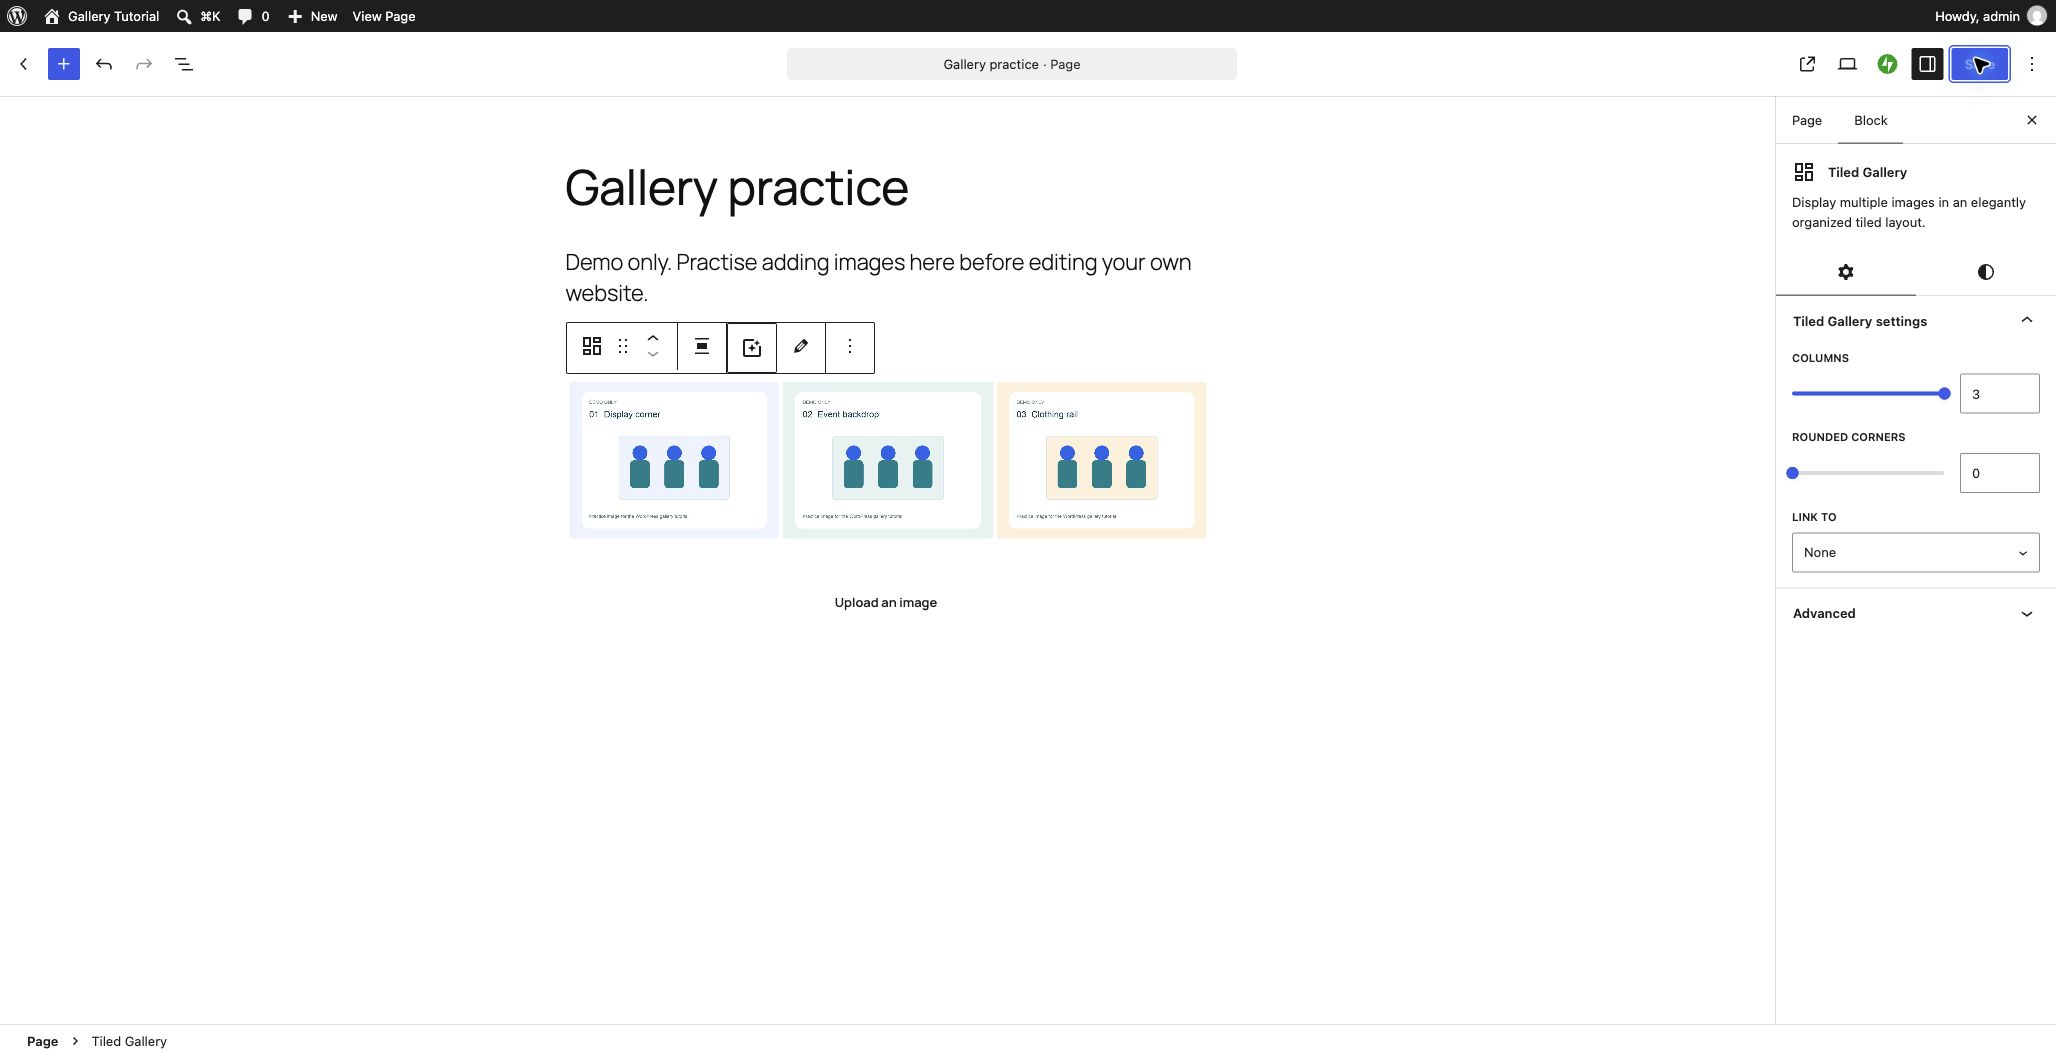
Choose Edit Gallery in the toolbar above the selected gallery. It opens a window showing the photos already in that gallery.
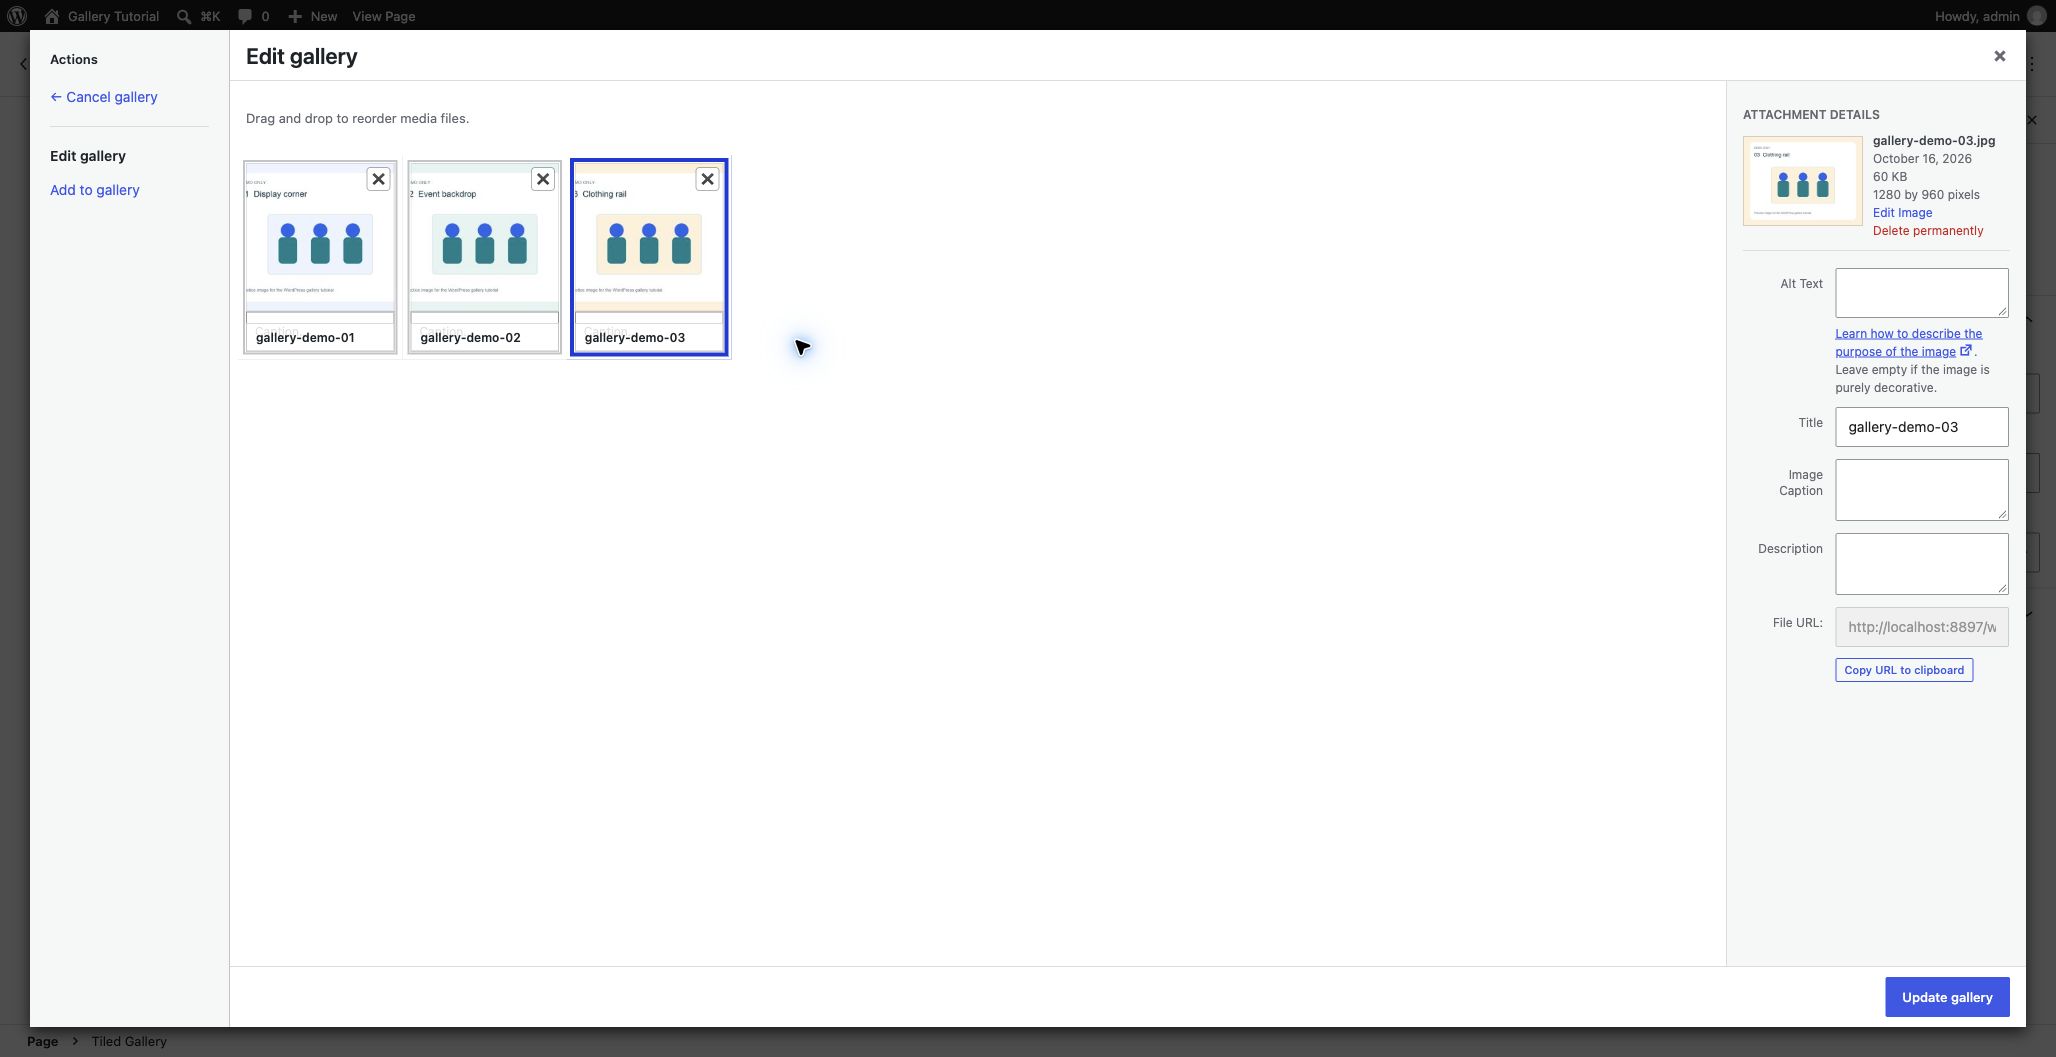
Keep those existing photos in place when you’re adding new ones. You don’t need to create a second gallery block.
3. Choose Add to gallery
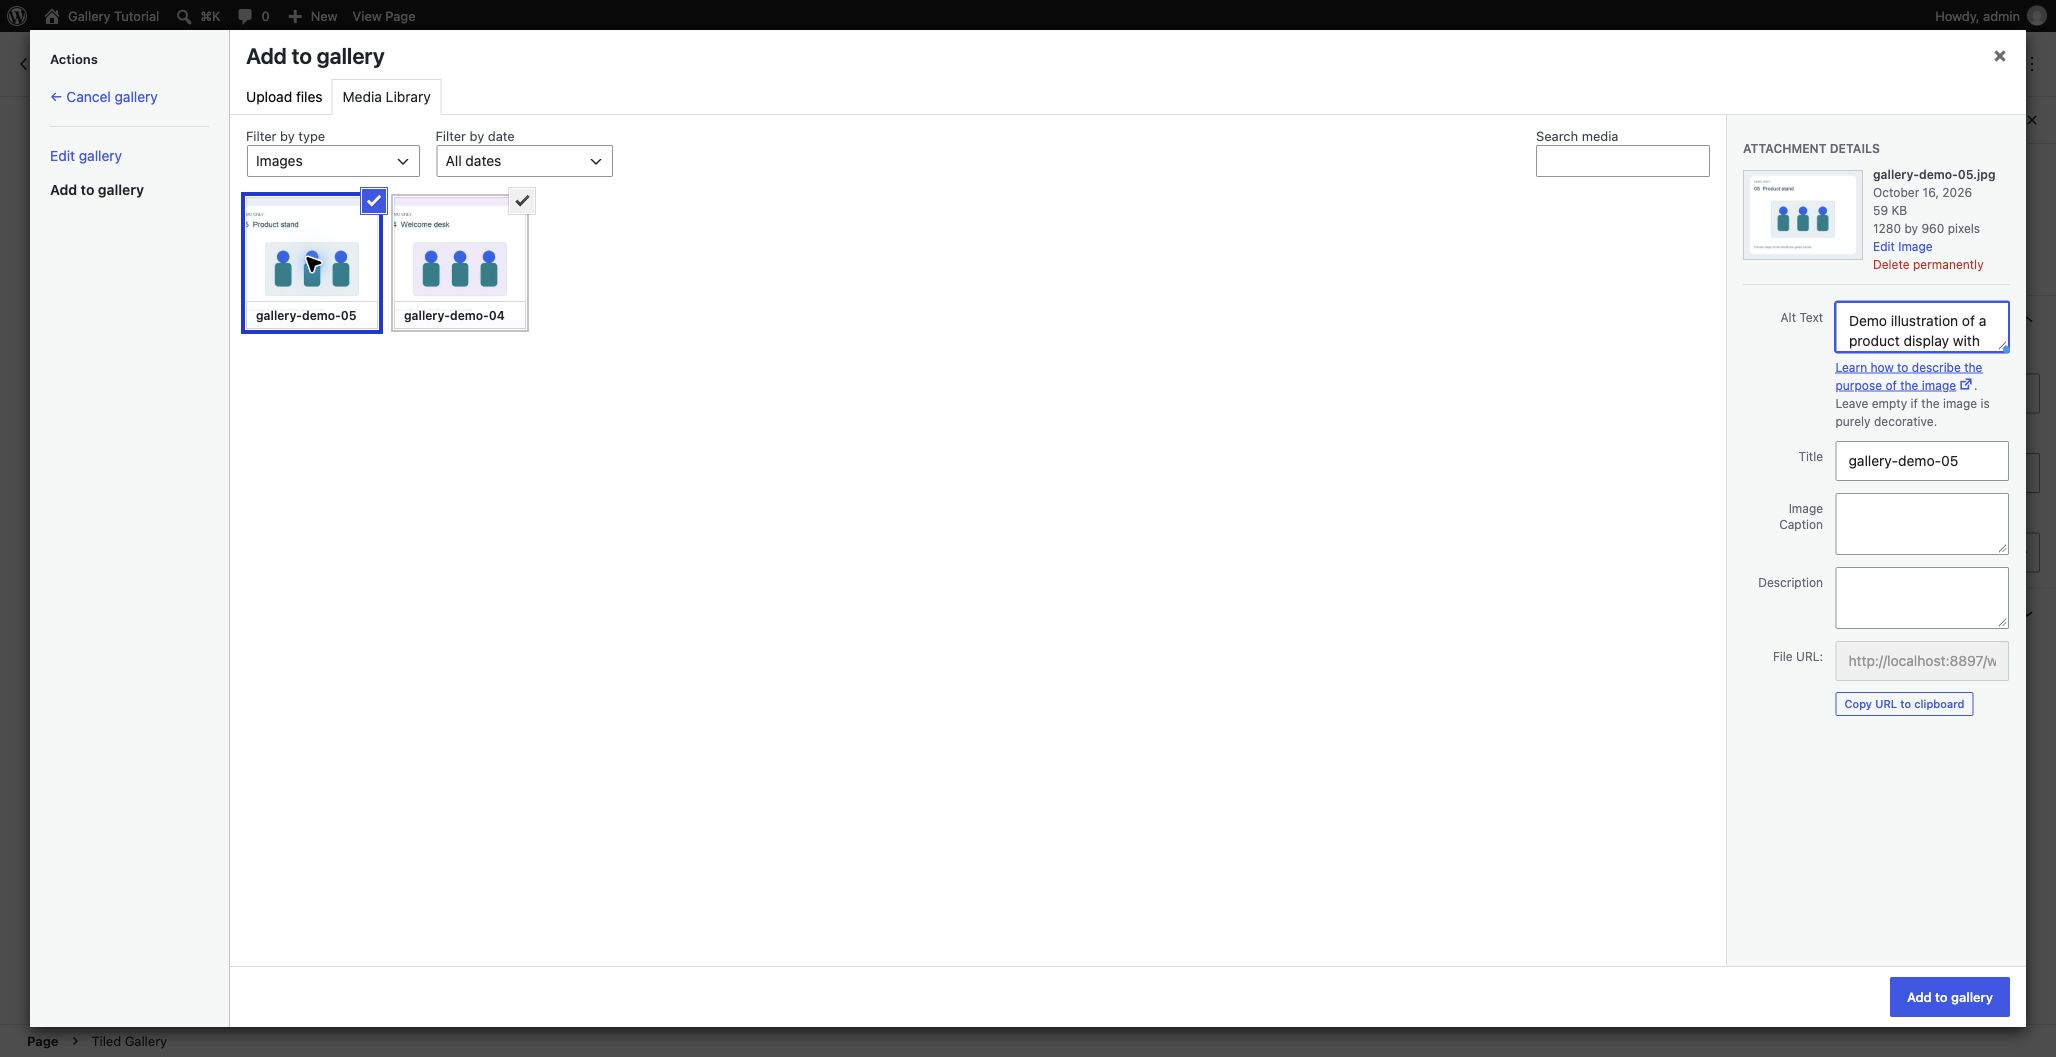
Choose Add to gallery on the left of the media window.
Use Media Library for photos already uploaded to your website. If the photos are on your computer, choose Upload files, then select the files and wait for their thumbnails to appear.
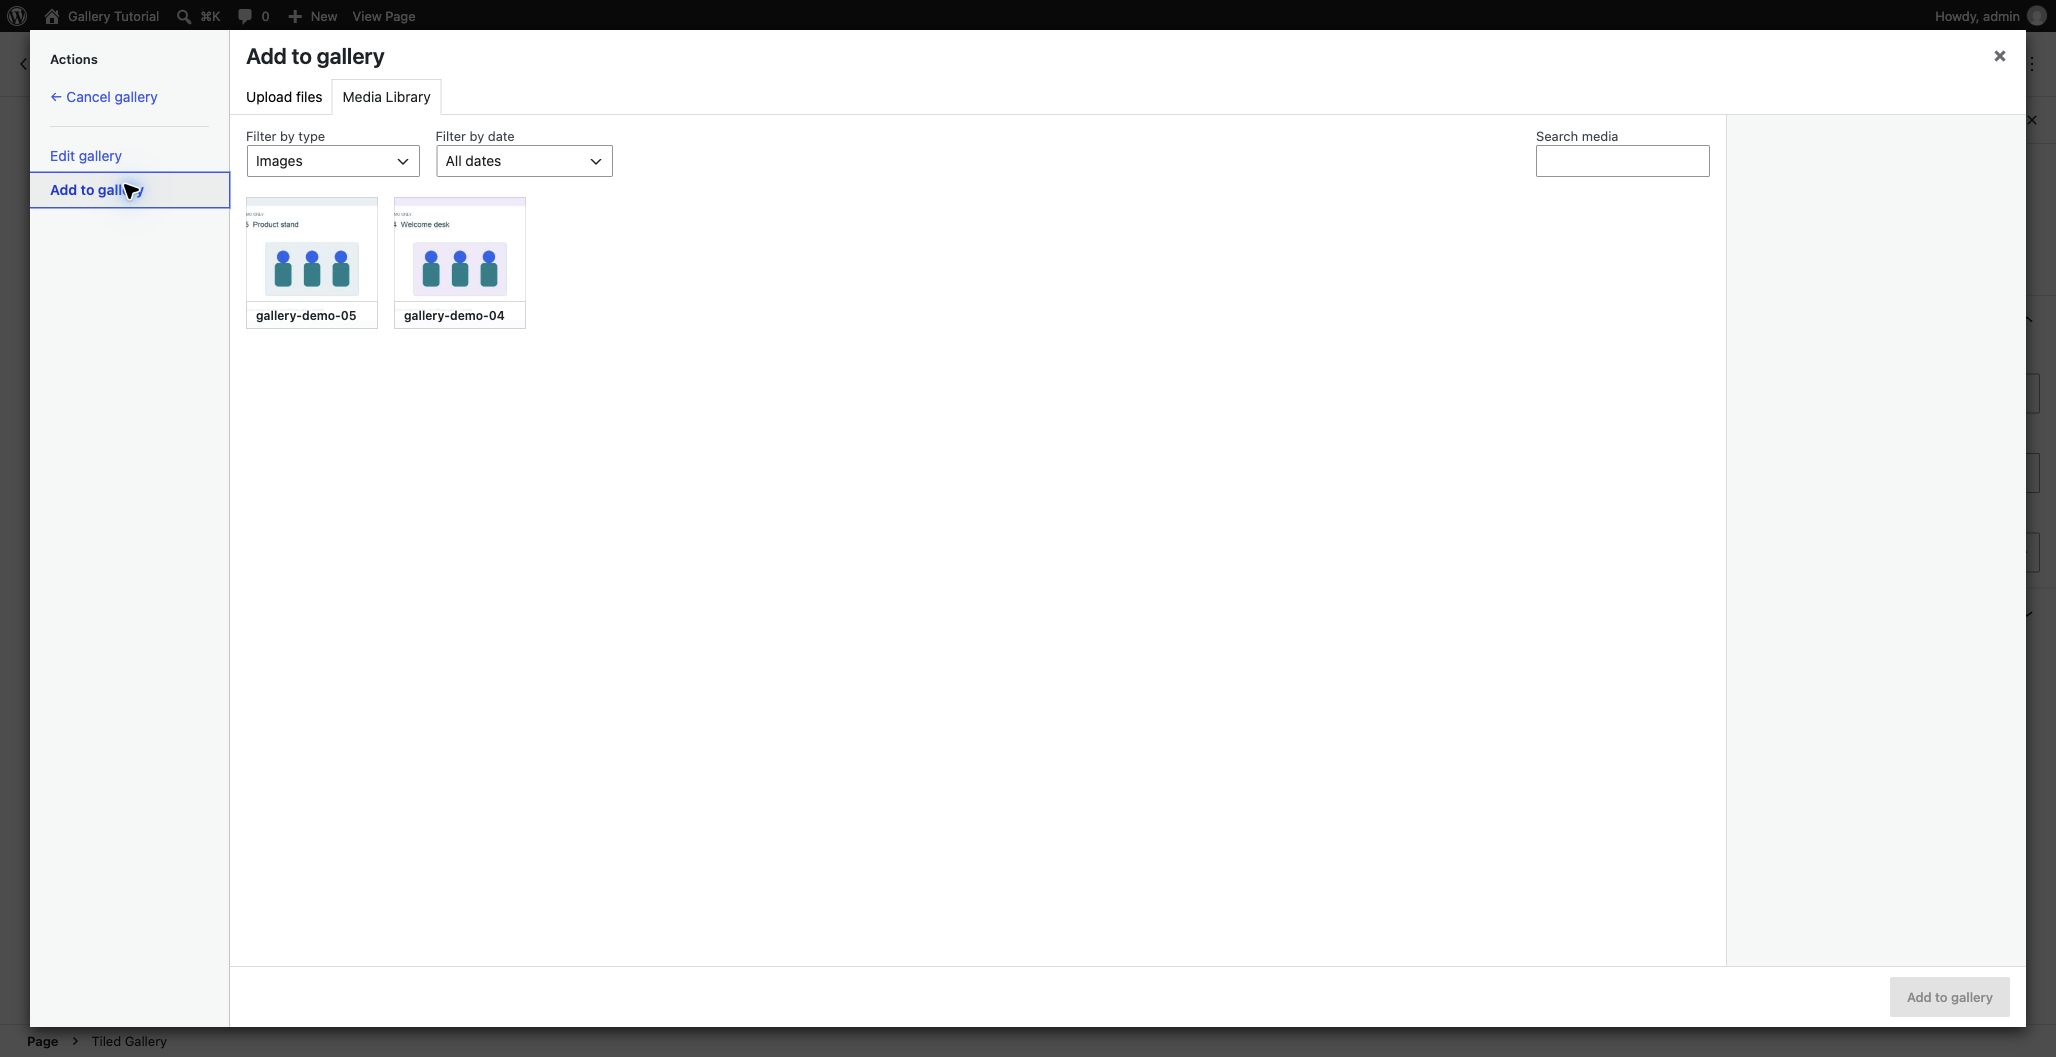
Click each photo you want to add. A tick marks a selected photo. Check the filenames and thumbnails before continuing.
When an image conveys useful information, add Alt Text that describes its purpose in context. For example, a real event photo might use “Three display stands beside the event entrance”, if that accurately describes the photo. Alt text is different from a visible caption. Purely decorative images can have empty alt text.
4. Confirm the new photos
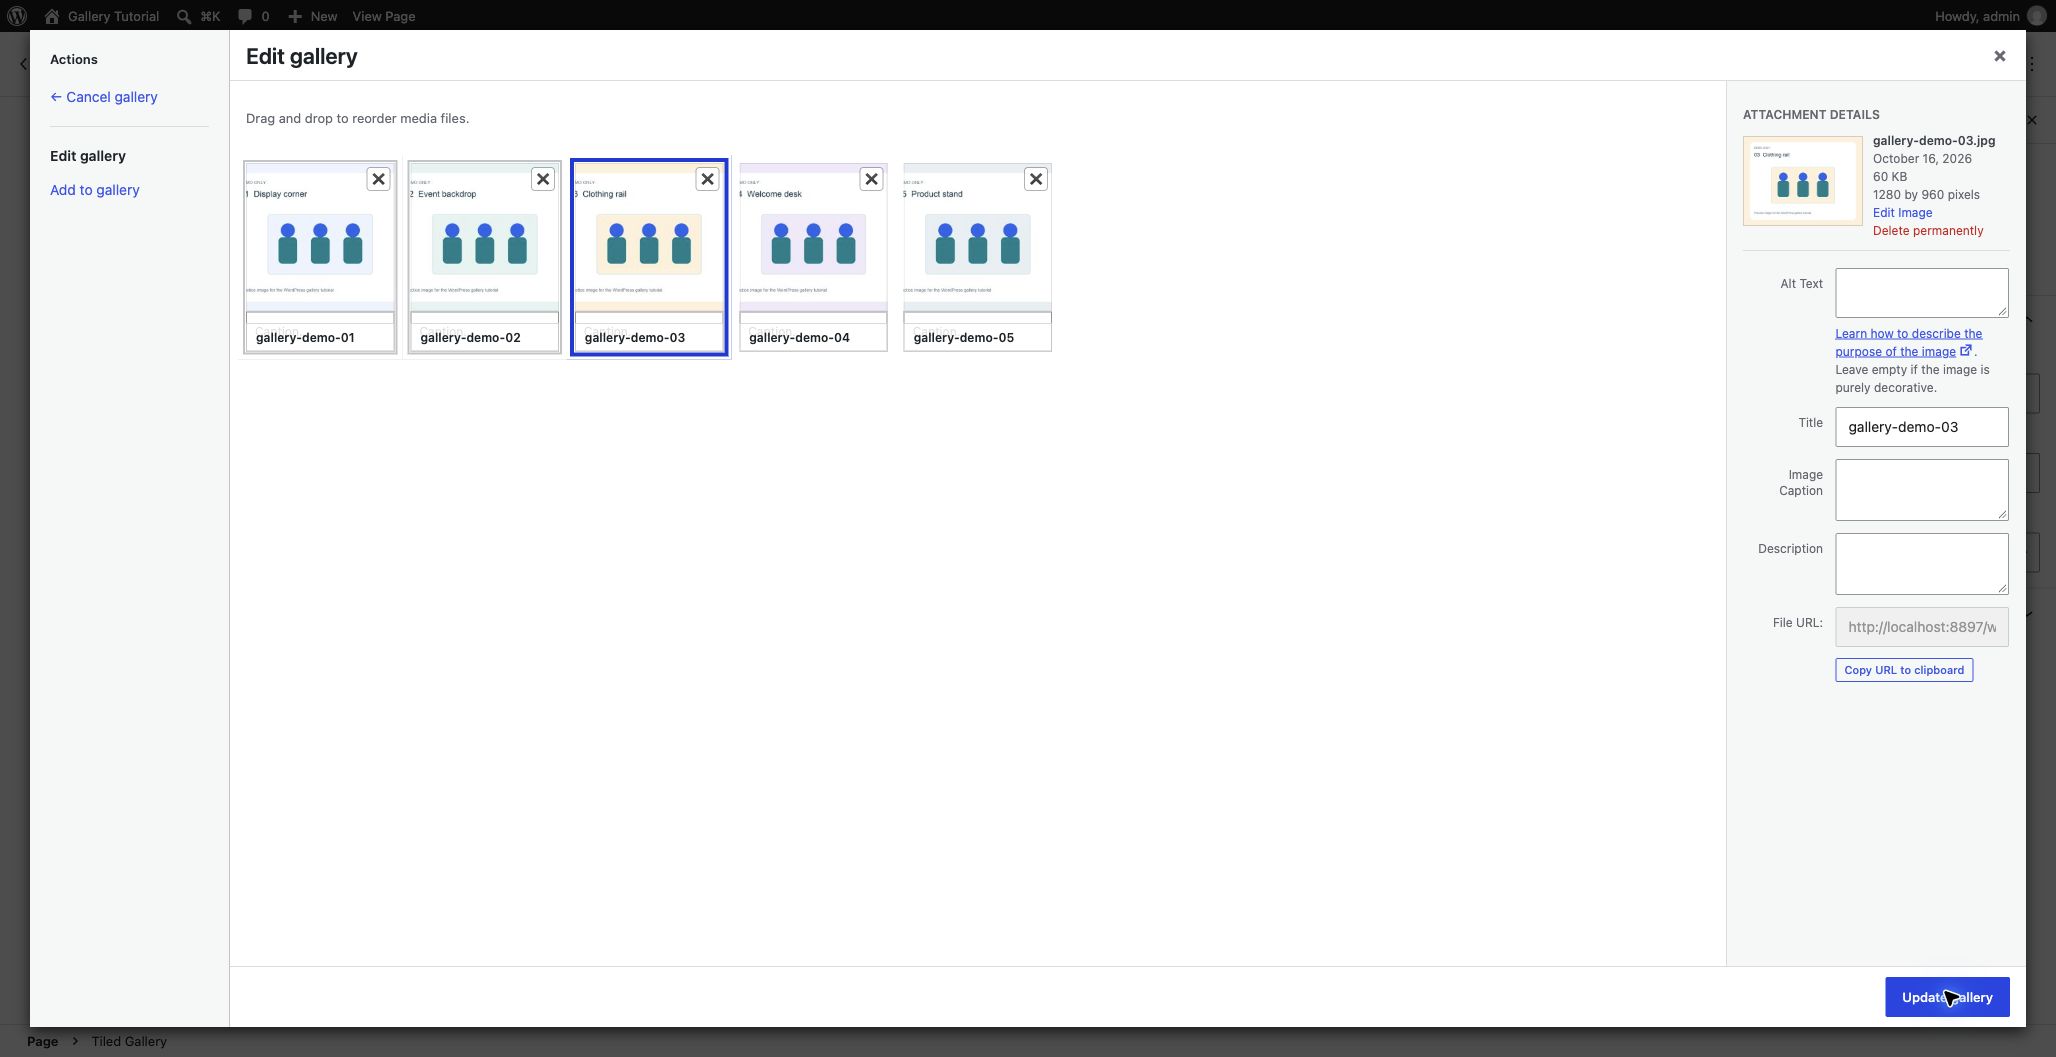
Choose the Add to gallery button at the bottom right. You’ll return to the gallery editor, where the new photos appear alongside the existing ones.
Check the complete set. Drag the thumbnails if you want to change their order. If you accidentally included a photo, use its Remove control here to take it out of the gallery. Avoid Delete permanently in Attachment Details, which deletes the media file from the site.
5. Update the gallery, then save the page
Choose Update gallery at the bottom right. This returns you to the page editor.
Now choose Save at the top right of the page editor. Some WordPress versions label this button Update. Wait for the saved confirmation.
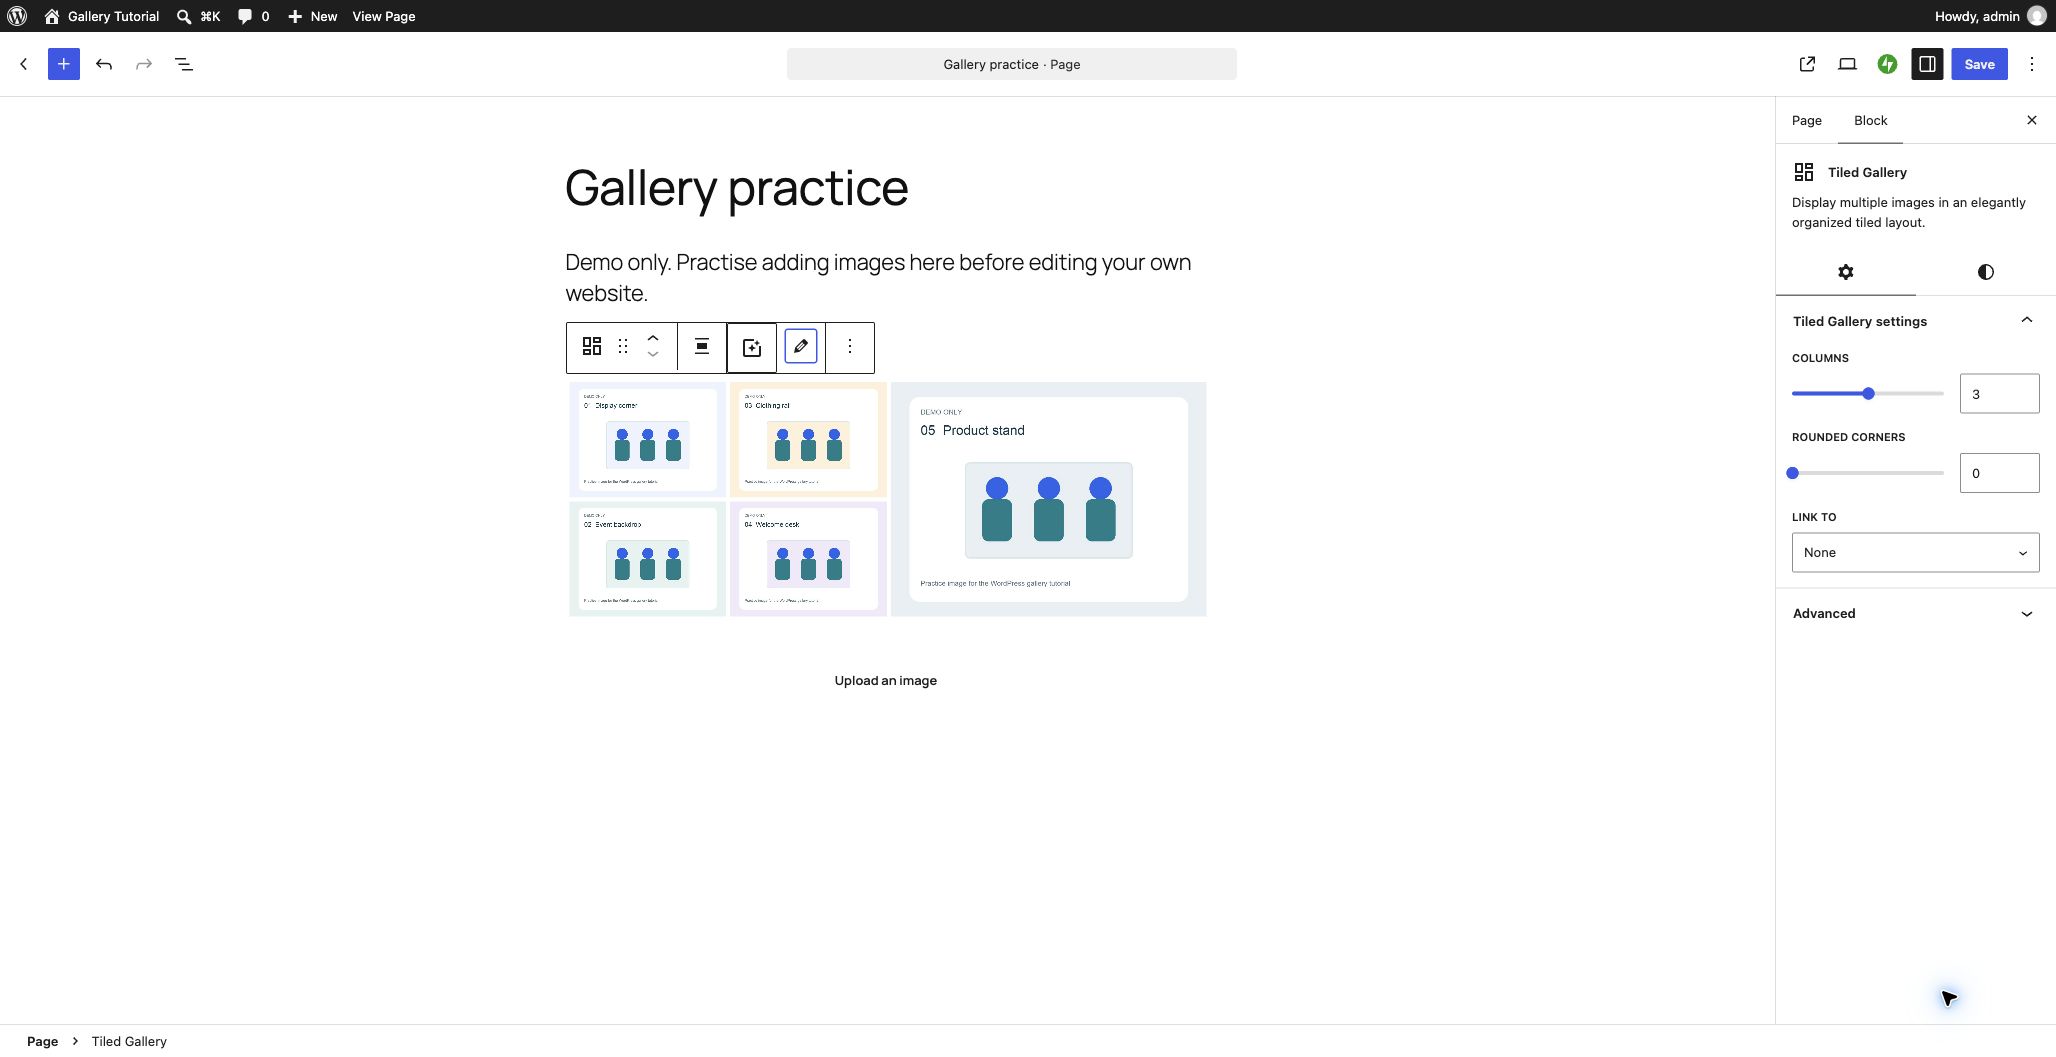
Update gallery confirms the photos within the editor. Save saves the page itself. You need both steps.
6. Check the page on your website
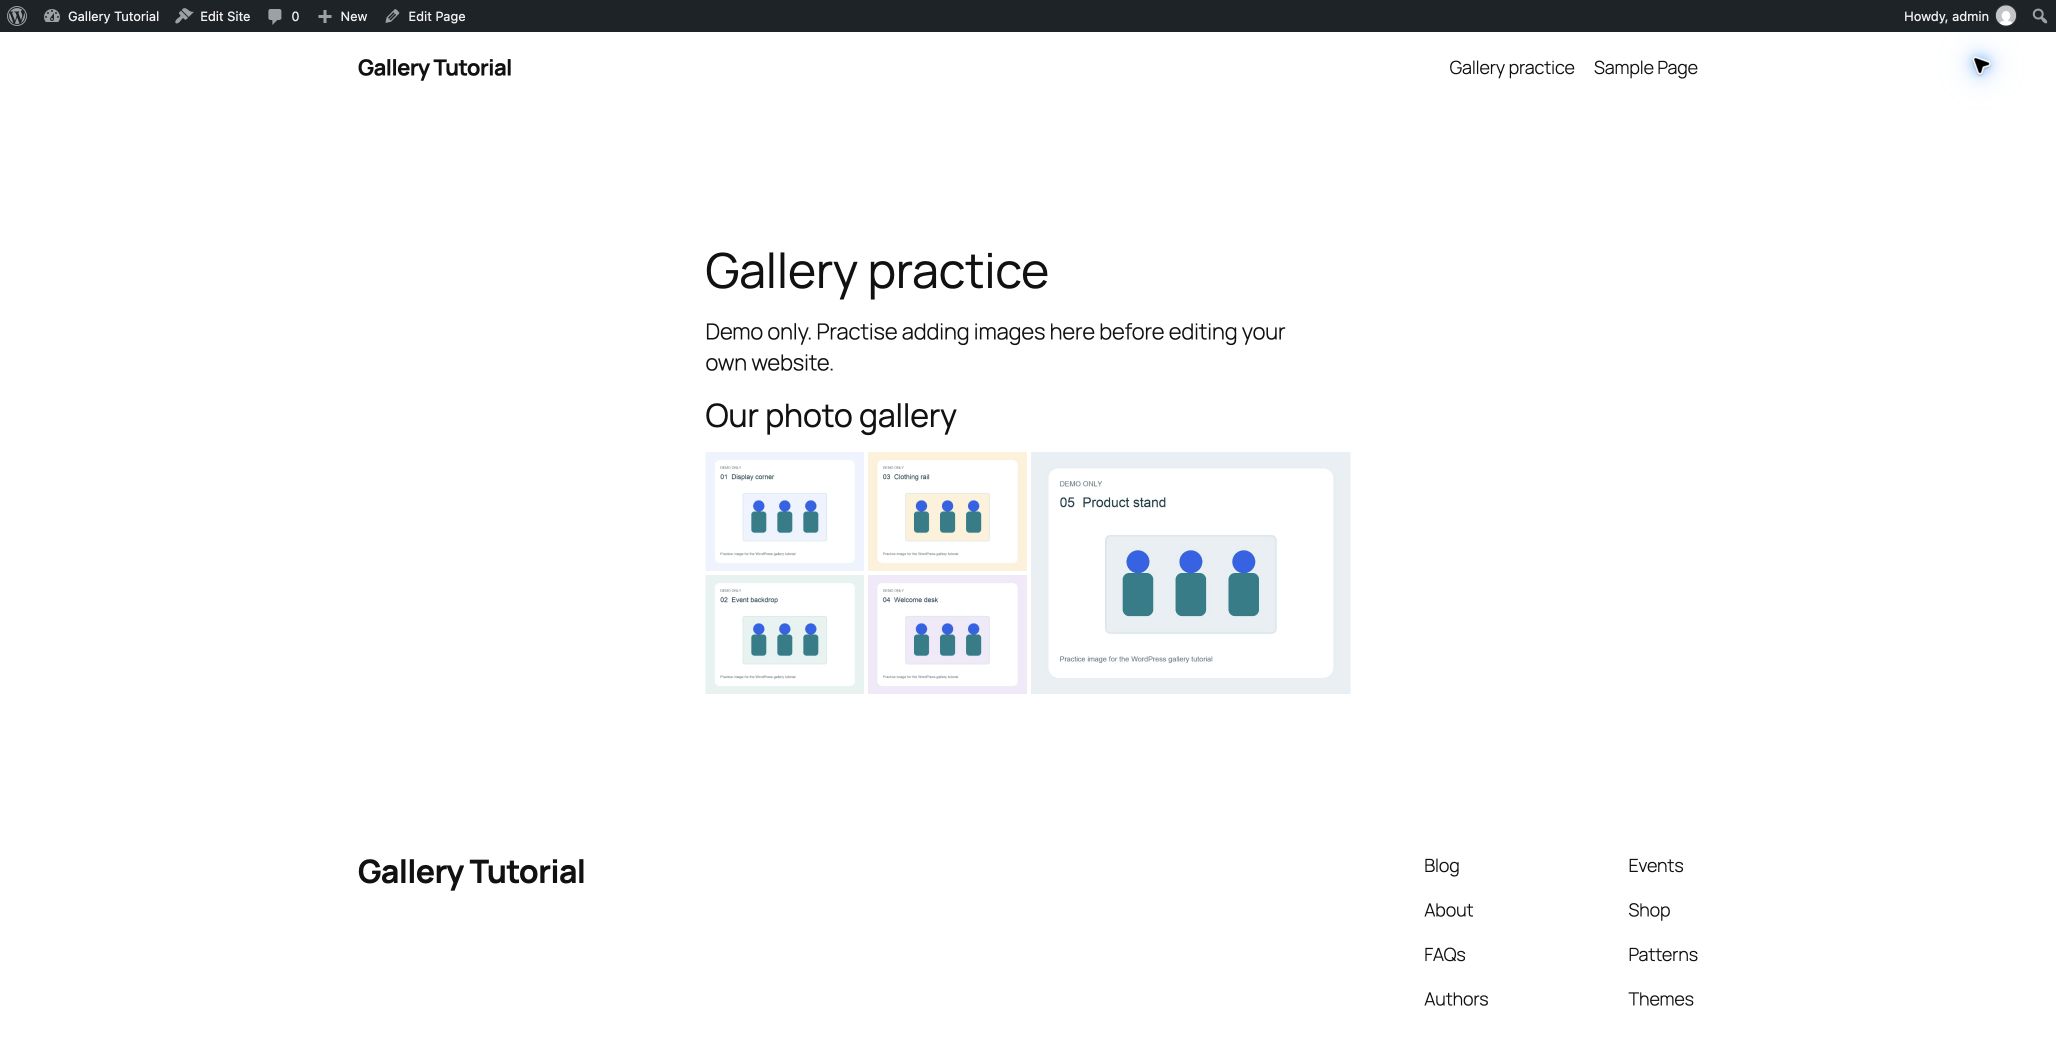
Choose View Page and check that the new photos appear, the older photos remain, and the order looks right. Check the layout on your phone too, especially if photos have different shapes.
If something looks different
There’s no Edit Gallery button. Select the whole Tiled Gallery block first. If the Block settings say Gallery or Slideshow, you’re using a different block and this guide’s controls won’t match.
A new photo doesn’t appear. Reopen Edit Gallery and check whether it was added. Confirm with Update gallery, save the page, then refresh View Page. If the editor shows the saved photo but visitors still see the old page, your site may be serving a cached version.
You chose the wrong image. Remove it from the gallery selection, then update the gallery and save again. You don’t need to delete the file from the Media Library.
You can’t upload files or save changes. Check the error message and your account permissions. A site administrator can help with access, upload limits, or file-format restrictions.
You changed something else by mistake. Before saving, use Undo to reverse the recent change. If you’ve already saved, ask the site administrator to help check the page’s revisions.
Practise once before editing your own page
Try the gallery in WordPress Playground. It opens a separate practice site in your browser with three gallery images and two more in its Media Library. Follow steps 1–6 to add Demo image 4 and Demo image 5. Changes there do not edit your own website. The first launch downloads WordPress and Jetpack, so allow a moment for setup. A desktop browser is easiest for editing.
Use a new draft page or a local test site to practise. You’ll need Jetpack’s Tiled Gallery block available in the editor.
Download the five practice images (170 KB ZIP). Unzip the file, then upload images 01, 02 and 03 to a Tiled Gallery on your practice page. Choose the Tiled columns style. Keep images 04 and 05 ready to add using the steps above.
To insert the block by copying and pasting, create a new, empty draft page. Open the editor’s three-dot menu and choose Code editor. Choose Copy code below, paste it into the empty page, then switch back to Visual editor. Select the photos for your initial gallery. This requires Jetpack. If WordPress reports an unsupported block, ask your administrator to enable it or use a local practice site.
<!-- wp:jetpack/tiled-gallery {"className":"is-style-columns"} /-->Once the gallery has three images, follow steps 1–6 to add images 04 and 05. Confirm that five images appear after saving. Keep the practice page as a draft or on your test site until you’re ready to share it.
References
– Jetpack: Tiled Gallery block – W3C: An alt Decision Tree
Tested in a local WordPress Studio site with WordPress 7.1.3 and Jetpack 16.3.1 on 16 October 2026. The screenshots show demo content. Button labels and editor appearance can differ by version.